The e-foilboard has taken over the world of watersports, and the Foil-Zone community is here to help the DIY e-foil fan.
This article provides a step-by-step discussion on how to implement a DIY e-Foilboard project, based on Foil-Zone's experience.
E-Foilboard building basics
Before we dive into the DIY e-Foil project, it's important to understand the basics. An eFoil mainly consists of the following main components:
- Motor
- battery
- ESC
- remote control
- board
- Foil
We take a quick look at each element and find out which brands and options are popular.
Foil Assist vs. E-FOIL
It's crucial to define your goals and desires right from the start. An assist is a great option for those who want to electrify their existing foils. This is a small electric drive that serves as a starting aid.
It is characterized by lower costs and less complexity in construction, as a small electronics box is mounted on the foil board. Due to its low weight, this solution offers a lot of riding fun for experienced foilers who want to maximize their time on the foil.
In contrast to the classic e-foils from Fliteboard, Aerofoils and Lift Foils, these drives are not intended for pure e-foiling due to their relatively small battery.
On a fully-fledged e-foilboard, all components are integrated in a waterproof battery compartment in the board. Due to their more powerful motorization, higher speeds can also be achieved. The batteries are also larger, which enables riding times of around 2 hours. This results in a higher weight, which makes the boards somewhat slower to ride (flywheel mass).

Once the basic decision has been made as to whether your E-Foil should be a supporting drive or a fully-fledged E-Foilboard, the next step is to select the right components, which will later be decisive for the performance, safety and success of the self-build.
The selection of these components is largely determined by the experience and recommendations of the Foil Zone community, which is an invaluable source of knowledge and support.
The motor: Outrunner or Inrunner
Outrunner or inrunner? Each option has its own advantages and disadvantages.
Outrunner
Outrunner motors, where the outer part of the motor rotates, are particularly popular with DIY e-foilboard farmers due to their characteristics. In addition to their low price, they are characterized by a comparatively high torque.
As the motors are open, they require some modifications that can be carried out quickly in order to use them in the water. It is common practice to seal the stator with thermal epoxy resin to prevent corrosion.
Alternatively, the stator can also be regularly bathed in a special white oil (e.g. Corrosion-X). In addition, the simple steel bearings must be replaced with stainless steel or ceramic bearings.
As the motor is not enclosed, water flows through it and therefore has excellent cooling properties. Therefore, contrary to the data sheet, it can be operated with currents of over 100A.
They are also more compact and lighter than sealed inrunners. Common models are the 6384 as an assist, which is available from €50.
The big brother 63100 has more than enough power to be used as an e-foil drive. If you want to save yourself the work, you can also fall back on a ready-made motor from Saite, which is not quite as cheap at €250-€380.

Inrunner
The major manufacturers and most DIY e-foils, on the other hand, use inrunners, as these are maintenance-free and can be mounted directly. The 65161 120kv is probably the most commonly used motor in the DIY E-FOIL sector. At 6kW, it has more than enough power and costs around 450€.
It is recommended to fill the motor with oil to lubricate the bearings and ensure that no water can get in. However, if you want more torque and speeds over 50 km/h, you will probably not be able to avoid a Flying Rodeo motor (as used on the Lift Foils), which is quite expensive at over 1000€. However, the quality is excellent. An alternative would be the 70182 from Maytech.
The choice between Outrunner and Inrunner depends heavily on individual preferences, goals and the desired riding style. It is advisable to check the Foil Zone community forums for specific recommendations and experiences.
Propeller: efficiency and speed
Now that we've covered the basics of the motor, let's turn our attention to another crucial element for the performance of your e-foilboard: the propeller.
Choosing the right propeller not only affects speed, but also efficiency and stability.
First of all, the propellers that often come with inrunners are designed for outboard motors and are not suitable for e-foils. A closer look at the Foil Zone community reveals that many initial problems can be traced back to these propellers.
Inrunners like the 65161 offer the advantage that there is a huge selection of aluminum and plastic propellers on the market (Highfly, Propellerking, Flite, Manta…). When buying, make sure you choose the round 12mm version with an M8 thread.
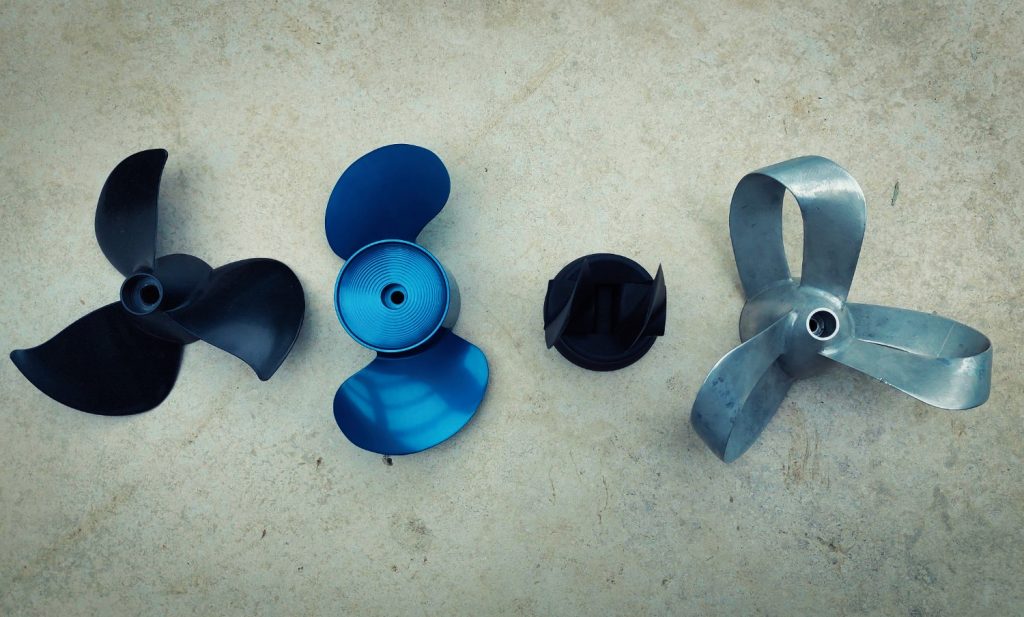
If you already have a 3D printer, you can find various models to print out in the forum. However, the printed propellers need to be sanded, reinforced with fabric and balanced.
But what is important?
The size of the propeller, measured by its diameter, has a significant influence on the torque and the force that is transferred to the water. Larger propellers generate more thrust, but are often heavier and require more energy. A diameter of 15 cm is common.
The pitch of the propeller indicates how much the propeller moves forward when it rotates once around its own axis. A higher pitch can lead to higher speeds, but also requires more power. 5-8 inches is common.
The number of propeller blades affects torque and responsiveness. Three-bladed propellers tend to produce smoother thrust, while two-bladed propellers can be more efficient. There are also folding propellers, which offer reduced drag and are therefore often used for assists or in the wave.
Battery: performance, capacity and safety
Now that we have looked at the drive components, let's turn our attention to an equally crucial element of e-foilboard construction: the e-foilboard battery.
The predominant types of batteries for e-foilboards are lithium-ion (Li-ion) and lithium-polymer (LiPo). Lithium-ion batteries are characterized by their high energy density, low self-discharge and light weight.
Lithium-polymer batteries offer a higher power density, but are more sensitive to improper handling. Prismatic cells are also occasionally found.
The capacity of the battery determines the runtime of your e-foilboard. A higher capacity means longer riding times. It is advisable to determine the ideal capacity based on your individual requirements and riding goals.
Typically, 1-2 kWh is a good compromise between weight and range.
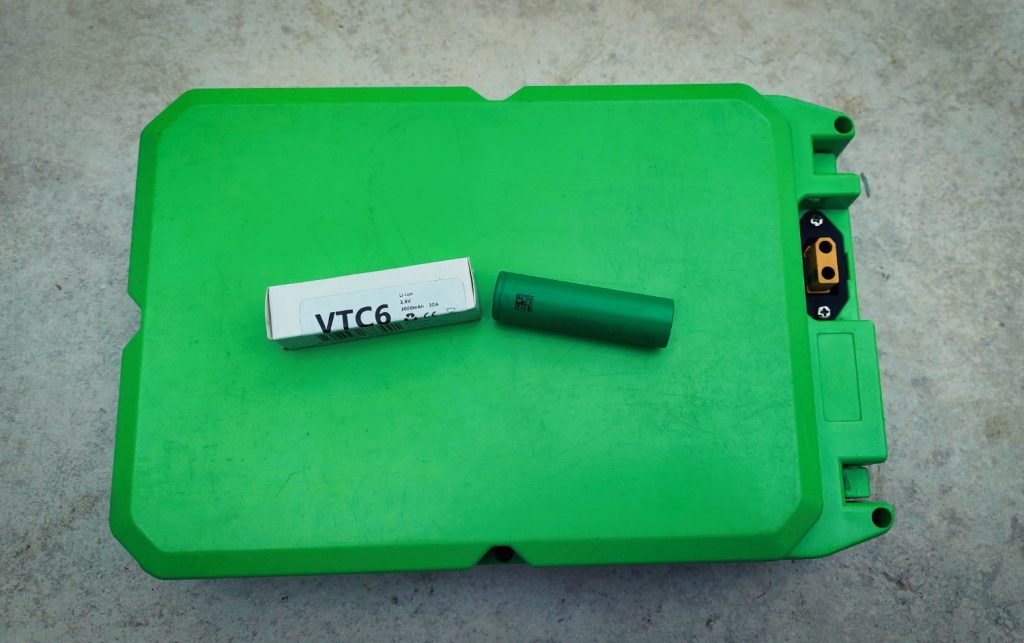
The battery voltage is a critical factor that influences the performance of the motor. A higher voltage usually leads to lower currents in the battery and more power. When selecting the battery, it is important that the selected voltage is compatible with the specifications of the motor and the controller.
Batteries between 10s-14s are typical. The major manufacturers use 14s as this is not as dangerous as 16s when touched.
The weight and size of the battery will affect the overall weight and balance of the DIY e-foil. Lighter and more compact batteries can improve maneuverability, while larger batteries allow for longer ride times.
Battery safety is crucial to ensure risk-free operation for an e-foilboard. The battery management system (BMS) is important for the safety of your battery. It monitors the temperature, cell voltages, balances them and protects against overcharging, over-discharging and short circuits.
Choosing a reliable BMS ensures safe and efficient use of the battery. There are smart models from ANT or LTT / Xiaoxiang that can be connected to a smartphone via Bluetooth.
Important: Invest in high-quality batteries, store them in a cool, dry place and avoid extreme temperatures. When transporting the eFoilboard, batteries should be safely stored in special protective bags or eFoil battery boxes to prevent short circuits or damage.
Build your own batteries: Challenges and safety aspects
Self-assembly of e-Foilboard batteries is a challenging task that not only requires technical know-how, but also requires the highest priority for safety and reliability. We therefore advise against building batteries yourself due to the potential risks.

Nevertheless, some basic steps are explained here, which should not be used as instructions in the event that this route should nevertheless be taken. It is essential that you only use high-quality lithium cells from reputable manufacturers.
At NKON, for example, you will find a huge selection of high-quality 18650 and 21700 round cells. The right cell selection based on capacity, voltage and discharge current is crucial here.
The finished pack should be able to deliver at least 4500W. It is recommended never to use the maximum discharge current for the calculation. In order to make the right choice of cells, I can recommend the tests by Battery Mooch, which has tested all cells.
Commonly used cells are the Sony VTC6, Molicel P42a, Samsung 40T or 50S or the LG M50LT.
For a basic understanding of how an E-Foilboard battery pack is constructed, I can recommend the video by Ludwig Bre:
However, you should have much more in-depth specialist knowledge before building. In addition, not only high-quality material is required for construction, but also a number of tools, including a spot welder.
The K-Weld is the clear recommendation here, as reliable connections between the nickel strip and the cell are particularly important at high currents. If soldering is necessary, proceed with extreme care to avoid overheating the cells.
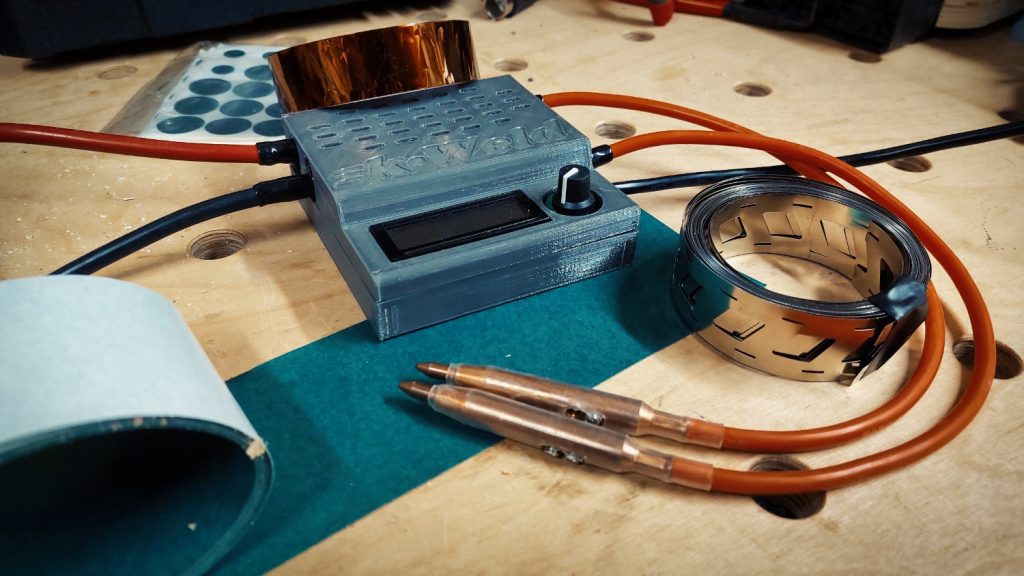
Keep the soldering time as short as possible, as this can damage the cells in the worst case. A soldering iron with at least 100W is required to solder appropriately thick silicone cables to the E-Foilboard battery.
The following applies: First solder the cable to the nickel strips over a large area and then weld it. Be aware of the potential risks and minimize them through careful planning, careful assembly, high-quality materials and strict quality controls.
Do not neglect these, as this can lead to dangerous situations. We strongly advise against self-assembly of E-Foilboard batteries, which involves considerable risks. The uncertainties associated with the quality of homemade batteries and the risk of short circuits, overheating and other potential hazards are not worth the savings.
Instead, use high-quality, pre-made batteries from trusted manufacturers or ask the community for help. Never buy prefabricated batteries from China, as they do not use high-quality cells and cannot deliver the specified power!
Charging E-Foilboard batteries
Charging E-Foilboard batteries correctly is crucial to ensure performance, durability and, above all, safety. Below I briefly discuss best practice.
Important: Keep an eye on the battery during the charging process, especially during the first charging cycles, to identify irregularities and take safety precautions.
Damaged batteries should no longer be used!
There is a question of faith in the community: battery management system (BMS) or model charger with balancing. The decision usually depends on individual preferences, personal experience and personal background knowledge.
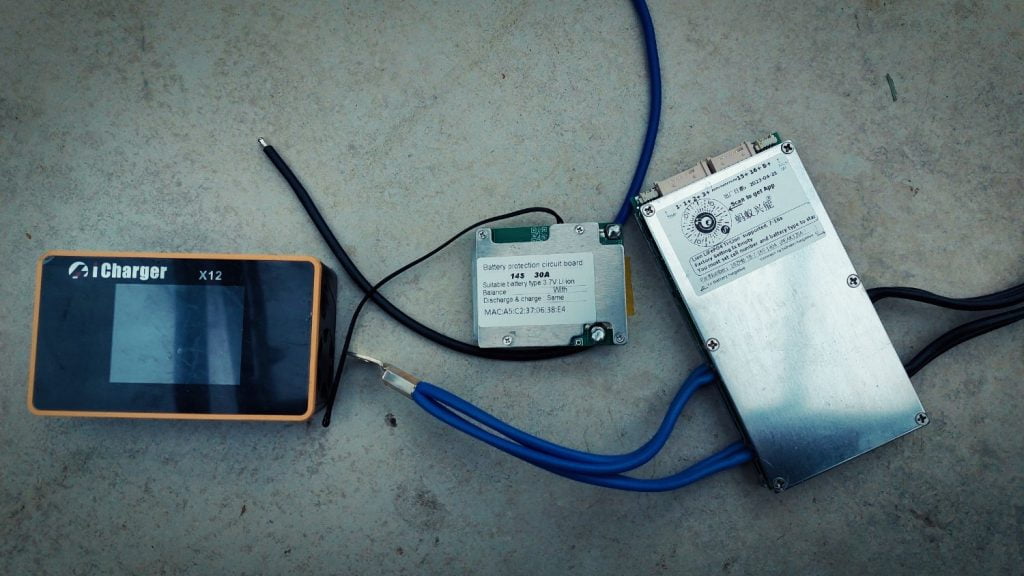
A BMS is specially designed for the protection and management of batteries and is relatively easy to integrate into the battery pack. It protects against overcharging, deep discharge, short circuits and monitors the temperature.
All that is needed for charging is a DC voltage source with current limitation. Many use their BMS as a so-called "charge-only" BMS, which means that the BMS is only used for charging, making it significantly smaller and cheaper.
The reason for this is that the BMS is often defective and then damages the cells. In this case, the motor controller takes over the shutdown during discharging when the battery reaches a certain state of charge. During the discharging process, no current flows through the BMS and it is therefore ineffective.
The alternative to the BMS are model chargers with balancing, which can often be used for different battery chemistries and types. In addition to their flexibility, they are characterized by good balancing with approx. 2A compared to the 100mA of the BMS.
The chargers can be used for several batteries. However, as with the "charge-only" BMS, there is no protection during discharging. Chargers from the manufacturers ISDT and Junsi are used.
In order to reduce costs even further, the battery packs are often split into 2x 6s or 7s, as the smaller chargers only cost a fraction.
ESC (Electronic Speed Controller)
When choosing the motor controller (the brain of the E-Foilboard), similar to the decision for chargers, there are enthusiasts who opt for a simple setup with a conventional Electronic Speed Controller (ESC).
At the same time, there are also those who do not want to miss out on the features of the Vedder Electronic Speed Controller (VESC).

Conventional ESCs are widely used and are available in various sizes and power classes, for example 12S 200A. Installation is often straightforward, as there is little to configure.
If you can live with slightly unstable BLDC motor operation due to limited configuration options, an ESC is a good choice. In contrast, VESCs offer a high level of programmability and enable fine-tuning of various parameters such as acceleration and more.
VESCs also support FOC, which results in virtually silent running and increased efficiency. Logs can be created with a Voyage System (metr) module. Different driver profiles can also be configured.
Although VESCs tend to be slightly more expensive than conventional ESCs, they offer greater control over performance.
There is no need to be afraid of the many parameters, as the Vedder community offers a wealth of information and support for VESC users. LudwigBre has also made a video on basic configuration.
However, it should be noted that opting for cheaper versions from China, such as Maytech, Flipsky and Makerbase, can lead to frequent failures due to the lack of original components. Their price of around 100-200€ compared to the 500€ for the original Trampa VESC may be tempting, but the quality of the original clearly surpasses this.
As a compromise, you could consider the BWESC V4 from 250€ from Germany, as it is based on the VESC project and uses high-quality components.
If you are looking for a simple plug-and-play solution and are less interested in detailed configuration options, a conventional ESC might suffice. However, if you want full control over performance and high customizability, a VESC might be a better choice.
E-Foilboard hand controller
Now that we've looked at the basic components such as the motor, battery and control systems, let's take a look at the interface between you and your e-foilboard. The right remote control not only enables precise control over your e-foilboard, but also contributes significantly to your riding experience.
There are actually only 4 common models that are in focus: the "25€ China Remote", the Maytech 1905, the Flipsky VX3 and the BREmote. The China Remote is characterized by its low price for a waterproof remote control, but is a simple PPM remote without additional functions.
The Maytech 1905 offers precise control for around €100 and is small and compact. In conjunction with a VESC, the display shows the battery level, speed, temperature and current. The remote is waterproof, but depending on the version, you may need to seal the display with epoxy resin to prevent failure in salt water.
The Flipsky VX3 offers precise control for around €100, is slightly larger and has a larger display. In addition to telemetry data, it also shows the GPS speed. It is also waterproof.
So far, none of the remote controls already mentioned have been convincing in the long term. Now to the BREmote. It is impressive to see that people like Ludwig not only develop a remote control themselves, but also generously share it with the community.
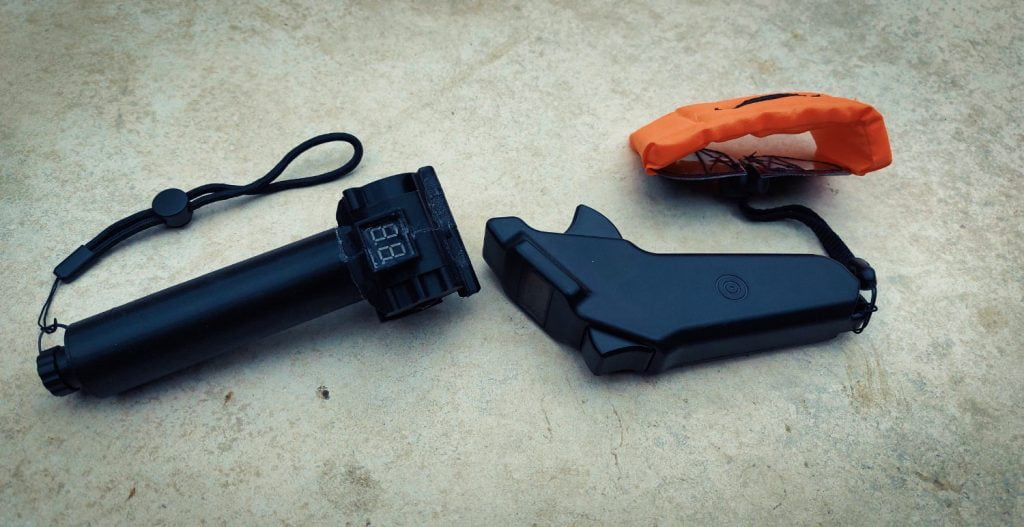
His commitment and ability to achieve this in a short space of time deserve the utmost respect. Especially in light of the fact that, despite years of effort, the manufacturers from China have not succeeded in bringing a remote control to the market that meets our specific needs.
The BREmote has met all my expectations and taken my e-foilboard experience to a new level. The ease of use, compact design and light weight make it an ideal companion on the water. The convincing price of around €50 also makes it an attractive option.
The fact that everything is open source enables numerous adaptations and further developments. Anyone with basic programming skills can easily implement new functions in the source code. The impressive range of over 100m to 2km rounds off the overall package. Thank you once again for your commitment and your great work!
The board
Choosing the board is a crucial step in building an e-foilboard yourself, and there are various options to suit individual needs and preferences. Choosing the right board size, especially in terms of length and volume, is a key factor.
The different sizes affect stability, maneuverability and the riding experience. People who have never stood on a board before and have no previous experience should perhaps plan for a slightly larger board with approx. 100l and at least 160cm at the beginning, as it offers more stability.
Experienced and lightweight riders can opt for smaller boards that promise more maneuverability and agility. In this case, it makes sense to attend one of our eFoil courses, where we will address your needs and support you with our expertise so that you don't end up with a board that is far too big.

However, it is not possible to make a general recommendation here, as there are too many factors to consider. Here we take a brief look at various board options and the DIY process:
1. ready-made board
Opting for a ready-made e-foil board offers the advantage of simplicity and convenience. These boards are specifically designed for use with e-foils and often come with pre-installed mounting points and watertight cut-outs. This makes assembly much easier, especially for self-builders who have less experience in boat building.
The variety of ready-made boards on the market makes it possible to choose a model that meets individual size and design requirements. Individual boards are available from Flite, Manta, Aerofoils and Lift, for example. These boards are available new from around €2000, but you can find a bargain or two on the second-hand market.
2. self-lamination
Those looking for a bit of a challenge can opt for the option of building a board 100% themselves. However, this process requires expertise in laminating. Self-laminated boards offer the ability to customize the shape and size, which emphasizes the DIY aspect of the project.

However, in addition to the actual construction, there is the difficulty of making the compartment watertight. Mistakes can quickly lead to additional material costs, which in turn raises the question of whether you should use a ready-made board.
3. inflatable board with fixed box
Inflatable boards with a fixed box, such as the Fliteboard Air, combine the advantages of stability and easy transportation. These boards offer a good mix of hardness and flexibility, while the fixed box allows the foil and other components to be mounted securely.
This is particularly interesting for users who value portability and would like to take the board with them. However, inflatable boards do not offer as much riding comfort as conventional boards, as they are usually quite large and stick to the surface of the water.
4. box on or in a finished board:
A popular approach with assist drives is to attach a box to the inserts on a conventional wingfoil or pronefoil board, which again means flexibility in board choice.
However, depending on the size of the board, the box can often get in the way. This is why some people decide to mount the box in an existing board. It is important to ensure that the stability of the board is not affected and that the box is leak-proof.
Choice of hydrofoil when building an e-foilboard
A decisive factor when building an e-foilboard yourself is the choice of hydrofoil, which influences stability and maneuverability on the water. The Foil Zone community often discusses different foil brands, but the foils from GONG are particularly popular.
GONG foils have established themselves as a popular choice as they offer a harmonious combination of performance, stability and price. Their modular design allows for customization to suit different needs and riding styles.
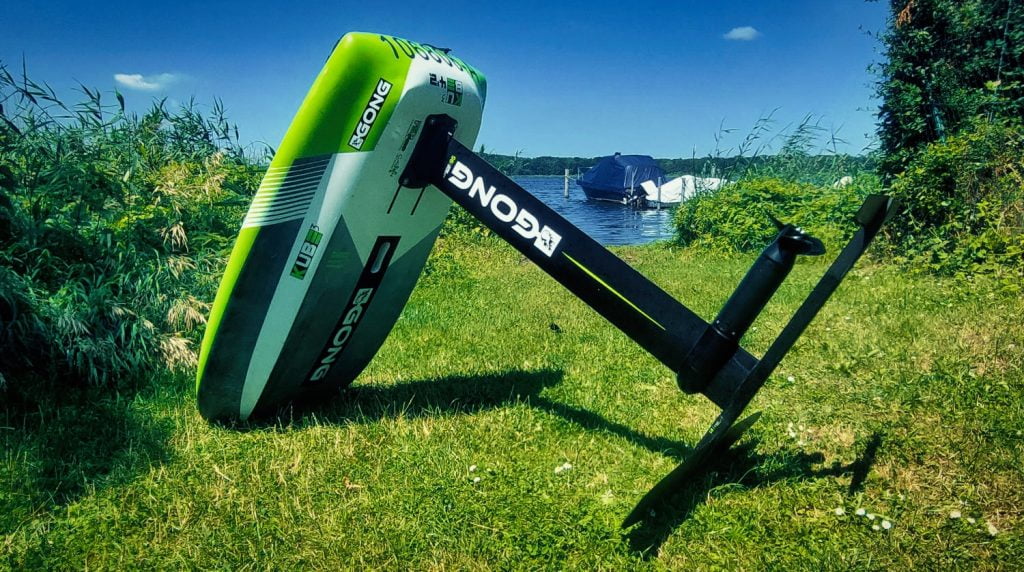
The possibility of combining different mast lengths, front and rear wings gives the rider a certain flexibility in fine-tuning the E- Foilboard. The Fluid and Curve range of foils are particularly popular.
In addition, GONG has a reputation for high quality materials and workmanship at an unbeatable price. It is important to emphasize that the choice of hydrofoil is not exclusively limited to GONG foils. There are many other reputable foil manufacturers such as Axis with first-class products
Conclusion on building your own e-foilboard
Building an e-foilboard yourself is not just a technical project, but a fascinating journey full of challenges, learning opportunities and ultimately a unique reward. The experiences from the Foil Zone community and other platforms make it clear that the journey to building your own e-foilboard can be extremely rewarding not only for technology enthusiasts, but also for water sports lovers.
The adventure begins with the decision as to whether you want to build a supportive drive or a fully-fledged e-foilboard. The choice of materials, especially for the board and foil, plays a decisive role. Here, experience reports from self-builders offer valuable insights into best practices and possible stumbling blocks.
The choice of motorization and battery is a key aspect to ensure optimal performance and runtime. Discussions on the use of outrunner or inrunner motors as well as the safety aspects of batteries help to make well-informed decisions.
The area of control systems, be it a BMS or the choice between different ESCs and VESCs, requires a certain level of expertise. Collective experience can be useful in finding the right solution.
When choosing the components, it is important to weigh up the pros and cons, personal preferences and technical requirements. The budget also plays a decisive role here.
In conclusion, building an e-foilboard yourself shows that dedication to technology, a willingness to learn and community support are crucial. The result is not only a customized e-foil, but also a unique riding experience on the water that goes far beyond building it yourself.
So I hope this introduction to DIY eFoil building has been helpful. For further information and help from the community, I can always refer you to the Foil-Zone forum. You can also find me there 😉
Author: Jan T.
